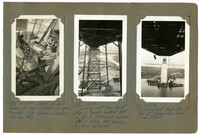
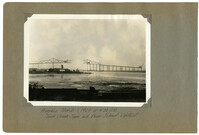
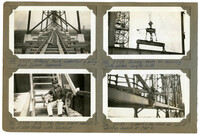
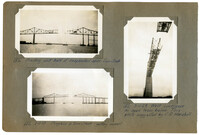
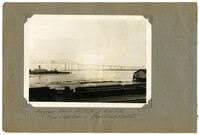
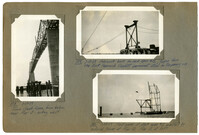
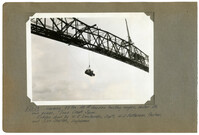
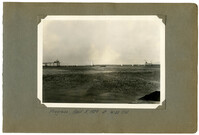
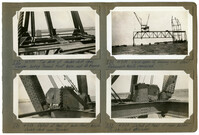
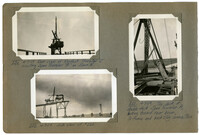
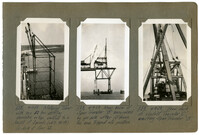
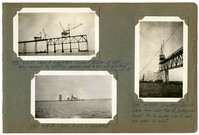
Image #108 (4.5" x 2.75"): "2-22-29. Detail of lead sheave at heel of boom on span traveler. Note swivel connection (See also #133)."; Image #110 (4.5" x 2.75"): "2-22-29. Looking west from top of Pier 2, toward anchored bent on Pier 1. Falsework columns still in place, but bracing has been removed."; Image #111. (4.5" x 2.75"): "2-22-29. Looking east from top of Pier 2 toward Pier 3 and Drum Island.";Three 4.5" x 2.75" B/W photos numbered 108, 110, 111
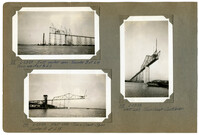
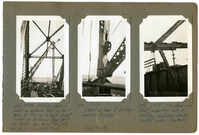
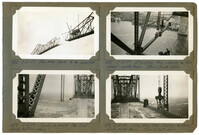
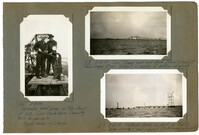
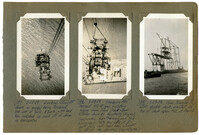
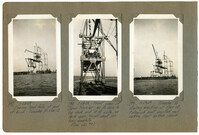
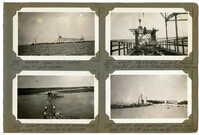
Image #113 (2.75" x 4.5"): "2-23-29. East anchor arm. Traveler Bat L4 Truss erected to L6."; Image #114 (2.75" x 4.5"): "2-23-29. West side - Town Creek Span. Traveler A at L15."; Image #115 (4.5" x 2.75"): "2-23-29. West side - Town Creek Cantilever.";Three 4.5" x 2.75" B/W photos numbered 113, 114, 115
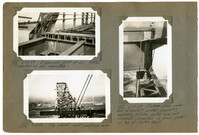
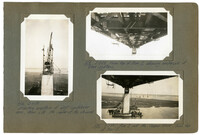
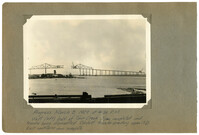
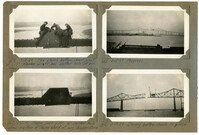
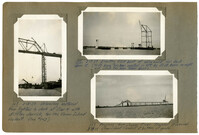
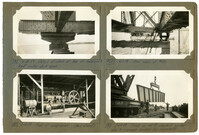
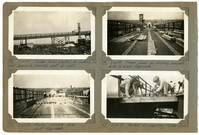
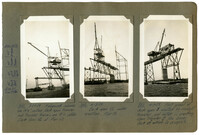
Image #116 (4.5" x 2.75"): "2-23-29. West or Charleston cantilever arm taken from L6 on east anchor arm. Pier 3 in foreground, elev. = 134ft."; Image #118 (4.5" x 2.75"): "2-24-29. Hydraulic hand pump with pressure gauge. Capacity, 8000# per sq. in."; Image #119 (4.5" x 2.75"): "2-24-29. rear tie-down of Span Traveler on Town Creek Span. Note bearing block under rear column for shimming up when using rear boom.";Three 4.5" x 2.75" B/W photos numbered 116, 118, 119
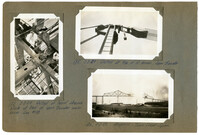
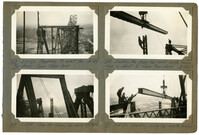
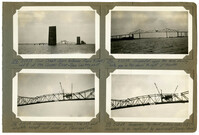
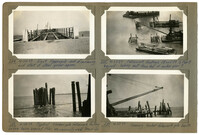
Image #120 (2.75" x 4.5"): "2-24-29. Expansion joint at L0. Plates supported on pipe separators."; Image #128 (2.75" x 4.5"): "3-3-29. Top chord - west cantilever arm."; Image #121 (4.5" x 2.75"): "2-24-29. Rocker shoe under end of viaduct girder, providing expansion between anchor arm and viaduct. Supported on cross girder at top of anchor bent.";Three 4.5" x 2.75" B/W photos numbered 120, 121, 128
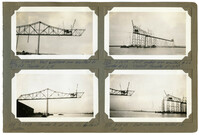
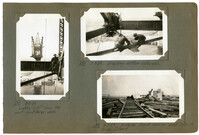
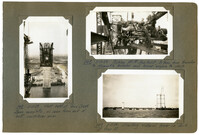
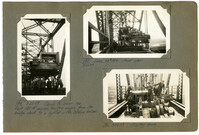
Image #122 (2.75" x 4.5"):"2-24-29. West cantilever arm erected to L17 L18 - Traveler at L15."; Image #124 (2.75" x 4.5"): "2-25-29. Traveler A at L16, its farthest position."; Image #123 (2.75" x 4.5"): "2-24-29. East anchor arm erected to L6. Traveler at L6. Viaduct traveler at right."; Image #125 (2.75" x 4.5"): "2-25-29. East anchor arm at Pier 3.";Four 4.5" x 2.75" B/W photos numbered 122, 123, 124, 125
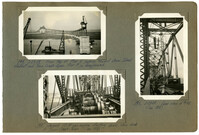
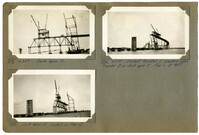
Image #126 (4.5" x 2.75"):"3-1-29. Starting erection of east cantilever arm, from L18, the center of the channel."; Image #129 (2.75" x 4.5"): "3-3-29. From top of Pier 2 showing underside of floor system."; Image #130 (2.75" x 4.5"): "3-3-29. Pier 3 and the Cooper River, from top of Pier 2.";Three 4.5" x 2.75" B/W photos numbered 126, 129, 130
Image #133 (4.5" x 2.75"): "3-3-29 Detail of lead sheave block at heel of span traveler main boom. See #108."; Image #135 (2.75" x 4.5"): "3-3-29. Detail at top of A-frame. Span traveler."; Image #136 (2.75" x 4.5"): "3-3-29. Progress - Town Creek Span.";Three 4.5" x 2.75" B/W photos numbered 133, 135, 136
Image #137 (4.5" x 2.75"): "3-7-29. Looking west from the east cantilever arm."; Image #138 (2.75" x 4.5"): "3-7-29. Erecting bottom laterals."; Image #139 (2.75" x 4.5"): "3-7-29. Material track laid on mud sills on Drum Island.";Three 4.5" x 2.75" B/W photos numbered 137, 138, 139
Image #140 (2.75" x 4.5"): "3-7-29. Material truck supported on piling. Drum Island Approach."; Image #141 (2.75" x 4.5"): "3-7-29. 'Billy' the Drum Island mascot, at top of stair tower with Buckholt."; Image #142 (2.75" x 4.5"): "3-7-29. Balance beam for handling plate girders. Length 10ft."; Image #146 (2.75" x 4.5"): "3-11-29. Support & tie-down for sill of stiffleg derrick at Pier 4.";Four 4.5" x 2.75" B/W photos numbered 140, 141, 142, 146
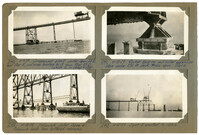
Image #143 (4.5" x 2.75"): "3-7-29. Stiffleg derrick used as material hoist on top of span at Pier 4, to feed viaduct traveler (in distance). Near stiffleg sticks thru truss (#146) and far leg is on viaduct (#145)."; Image #144 (4.5" x 2.75"): #3-7-29. Detail at heel of stiffleg derrick SO4383 (See #167)."; Image #145 (4.5" x 2.75"): "3-7-29. Tie-down and strut supporting end of stiffleg projecting outside viaduct girder (See #143).";Three 4.5" x 2.75" B/W photos numbered 143, 144, 145
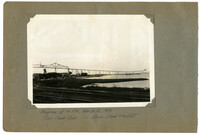
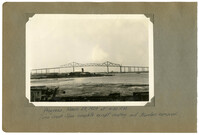
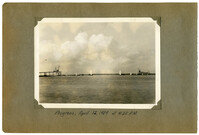
Unnumbered Image (5" x 7"): Progress March 8, 1929 at 4:30 P.M. West (left) half of Town Creek Span completed and traveler being dismantled. Viaduct traveler erecting span 17D. East cantilever arm complete.";One 5" x 7" B/W photo
Image #147 (4.5" x 2.75"): "3-11-29. West half of Town Creek Span complete, as seen from end of east cantilever arm."; Image #148 (2.75" x 4.5"): "3-11-29. Picking 150 HP Gas. Hoist, 31 tons, from traveler to dismantle traveler and lower engine to deck."; Image #149 (2.75" x 4.5"): "3-11-29. Erecting material tower on dock at Pier 13.";Three 4.5" x 2.75" B/W photos numbered 147, 148, 149
Image #150 (2.75" x 4.5"): "Erecting east half of suspended span - Town Creek."; Image #152 (2.75" x 4.5"): "3-13-29. Progress in Town Creek - getting nearer!"; Image #151 (2.75" x 4.5"): "3-11-29. West cantilever as seen from below. This photo suggested by C.D. Marshall.";Three 4.5" x 2.75" B/W photos numbered 150, 151, 152
Image #153 (2.75" x 4.5"): "3-13-29. One more panel to be erected."; Image #154 (2.75" x 4.5"): "3-13-29. Ready to erect the first closing bottom chord."; Image #155 (2.75" x 4.5"): "3-13-29. Erecting the closing bottom chord - south truss - Town Creek Span."; Image #158 (2.75" x 4.5"): "3-13-29. Erecting the closing bottom chord - north truss - Town Creek Span.";Three 4.5" x 2.75" B/W photos numbered 153, 154, 155, 158
Image #159 (2.75" x 4.5"): "3-13-29. The closing bottom chord joint at L17! Member on left has slotted hole at pin."; Image #160 (2.75" x 4.5"): " Closing joint at L17! 4" slotted hole allows erection of closing chord at any temperature."; Image #161 (2.75" x 4.5"): "3-13-29 Progress."; Image #162 (2.75" x 4.5"): "3-3-29. Closing bottom chords in place.";Four 4.5" x 2.75" B/W photos numbered 159, 160, 161, 162
Image #163 (2.75" x 4.5"): "3-15-29. Preparing to erect the closing top chords - Town Creek Span."; Image #164 (2.75" x 4.5"): "3-15-29. Gap for closing top chord U16 U18."; Image #165 (2.75" x 4.5"): "Erecting the closing top chord - south truss. Gap is about 2" longer than chord. 3-15-29."; Image #171 (2.75" x 4.5"): "3-15-29. Erecting closing top - north truss.";Four 4.5" x 2.75" B/W photos numbered 163, 164, 165, 171
Image #166 (4.5" x 2.75"): "3-15-29. Hydraulic hand pump on top chord at U13, Town Creek Span. Capacity 8000 lbs. Per sq. in. 'Swede' Nelson and V.I. Varga."; Image #168 (2.75" x 4.5"): "3-15-29. Town Creek Span and Drum Island Viaduct from Cooper River. Viaduct is nearly at bottom of grade."; Image #169 (2.75" x 4.5"): "3-15-29. Material tower on dock at Pier 13. One boom erected and rigged. (50 ft. boom, on right).";Three 4.5" x 2.75" B/W photos numbered 166, 168, 169
Image #167 (4.5" x 2.75"): "3-15-29. Unloading material from lighters to dock at Pier 4 with stiffleg derrick, for the Drum Island viaduct. (See #143.)"; Image #172 (2.75" x 4.5"): "3-17-29. Erecting first bent of false work for deck span 12. (70 ft. boom has been erected, on left, by 50 ft. boom on right and which has been taken down)."; Image #173 (2.75" x 4.5"): "3-17-29. Progress - from Cooper River. Traveler A removed. Drum Island Viaduct at bottom of grade.";Three 4.5" x 2.75" B/W photos numbered 167, 172, 173
Image #174 (2.75" x 4.5"): "3-17-29. Town Creek Span between Piers 9 (left) and 8 of the Cooper River Span. Looking west."; Image #175 (2.75" x 4.5"): "3-12-29. Suspended Span swung (3-16-29) and complete except last panel of floor system."; Image #176 (2.75" x 4.5"): 3-20-29. Suspended span has been swung. Note gap in top chord to right of traveler."; Image #177 (2.75" x 4.5"): 3-20-29. Temporary top chord jacking links U13 U14 removed to be replaced by permanent 'dummy' chords.";Four 4.5" x 2.75" B/W photos numbered 174, 175, 176, 177
Image #178 (4.5" x 2.75"): "3-17-29. Town Creek Span, from below, near Pier 3 - looking west."; Image #179 (2.75" x 4.5"): "3-17-29. Falsework bent for deck span #12, taken from the East Approach Viaduct permanent steel for temporary use."; Image #180 (2.75" x 4.5"): "3-20-29. First panel of deck span #12 erected by material tower at Pier 13. Pier 12 at left.";Three 4.5" x 2.75" B/W photos numbered 178, 179, 180
Image #181 (2.75" x 4.5"): "3-20-29. Detail of shoe at top of falsework bent under deck span."; Image #182 (2.75" x 4.5"): "3-17-29. Fuel oil compressor - (semi-diesel)."; Image #201 (2.75" x 4.5"): "4-1-29. End View of #181."; Image #183 (2.75" x 4.5"): "3-20-29. Twist in 40 ft. viaduct girder due to improper loading for shipment.";Four 4.5" x 2.75" B/W photos numbered 181, 182, 183, 201
Image #184 (4.5" x 2.75"): "3-22-29. Ready to lower the first 150 HP gasoline hoisting engine from the bridge deck to a lighter in the stream below."; Image #185 (2.75" x 4.5"): "3-22-29. Same as #184 - front view."; Image #186 (2.75" x 4.5"): "3-22-29. Starting down.";Three 4.5" x 2.75" B/W photos numbered 184, 185, 186
Unnumbered Image (5" x 7"): "Lowering 33 ton, 150 HP Gasoline hoisting engine, under its own power. Town Creek Span. Ridden down by W.E. Omohundro, Sup't., W.S. Patterson, Pusher, and John Shelton, Engineman.";One 5" x 7" B/W photo
Image #187 (4.5" x 2.75"): "3-22-29. Looking straight down on engine being lowered. One set of falls, 8 parts, with lead line snatched so lead off of drum is horizontal."; Image #188 (4.5" x 2.75"): " 3-28-29. Lowering the second 150 HP gas. hoisting engine from Town Creek Span. ridden down by Dougherty (Eng'm'n.), Omohundro, Leatherman, and two bridgemen. Note two sets of 5-part falls and lead lines straight up off of the drums. (See 195 & 196)"; Image #189 (4.5" x 2.75"): "3-27-29. Span Traveler A, with double deck, erected on top of deck span #12, at Pier 13.";Three 4.5" x 2.75" B/W photos numbered 187, 188, 189
Image #190 (2.75" x 4.5"): "3-26-29. Timber forms erected for curbing, on West Approach. Concrete plant at right."; Image #191 (2.75" x 4.5"): "3-26-29. Timber forms for pouring concrete deck on West Approach."; Image #192 (2.75" x 4.5"): "3-26-29. Pouring concrete deck. West Approach."; Image #193 (2.75" x 4.5"): "3-26-29. Method of supporting timber forms.";Four 4.5" x 2.75" B/W photos numbered 190, 191, 192, 193
Image #194 (2.75" x 4.5"): "3-27-29. From top of Pier 6, looking toward Drum Island viaduct and Town Creek Span. Pier 5 in foreground."; Image #195 (2.75" x 4.5"): "Second 150 HO gas. Engine starting down thru deck of Town Creek Span. (See 188)"; Image #196 (4.5" x 2.75"): "3-28-29. rear view of #195. (See 188)";Three 4.5" x 2.75" B/W photos numbered 194, 195, 196
Unnumbered Image (5" x 7"): "Progress, March 29, 1929 at 4:30 P.M. Town Creek Span complete except riveting and travelers removed.";One 5" x 7" B/W photo
Image #197 (4.5" x 2.75"): "3-28-29. Reaving load falls at end of boom - Traveler A - Pier 13."; Image #198 (4.5" x 2.75"): "3-28-29. Front view of Span Traveler, 40 ft. high to top deck and 18 ft. wide, on deck span. Weight about 150 tons, complete. (See also #4)."; Image #199 (4.5" x 2.75"): "3-29-29. Traveler A starting erection at Pier 13. Falsework bent erected and setting first bottom chord.";Three 4.5" x 2.75" B/W photos numbered 197, 198, 199
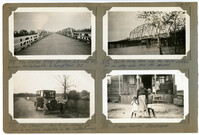
Image #208 (2.75" x 4.5"): "3-30-29. The Santee River Bridge, 2.2 miles long, between McClellanville & Georgetown, S.C."; Image #209 (2.75" x 4.5"): "3-30-29. 200 ft. Swing Span over the North Santee. All our piling came thru this channel."; Image #212 (2.75" x 4.5"): "3-30-29. The 'Chariot' - McC. M. Co's official car. Used by our piling inspectors in the Santee Swamps."; Image #213 (2.75" x 4.5"): "3-30-29. A negro 'mammy' storekeeper.";Four 4.5" x 2.75" B/W photos numbered 208, 209, 212, 213
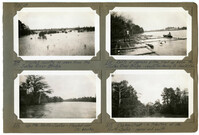
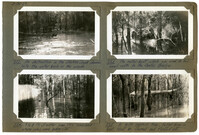
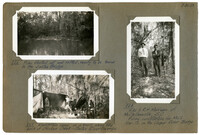
Image #214 (2.75" x 4.5"): "3-30-29. Flooded country as seen from the Santee River Bridge."; Image #215 (2.75" x 4.5"): "3-30-29. Rafts of cypress piling tied up below the Santee River Bridge - ready for towing to Charleston."; Image #216 (2.75" x 4.5"): "3-30-29. Up the North Santee - flooded over its banks."; Image #217 (2.75" x 4.5"): "3-30-29. Chicken Creek - a tributary of the North Santee - narrow and swift.";Four 4.5" x 2.75" B/W photos numbered 214, 215, 216, 217
Image #218 (2.75" x 4.5"): "3-30-29. Negro wood-cutters enroute home for the week end."; Image #219 (2.75" x 4.5"): "3-30-29. A hollow-log canoe. Duncan at the paddle."; Image #220 (2.75" x 4.5"): "3-30-29. Laurel Hill Island - water 2 to 3 ft. deep over the 5 ft. banks at normal stage. Most of the 85 ft. and 90 ft. piling came from here."; Image #221 (2.75" x 4.5"): "3-30-29. Chicken Creek - note height of water around the tree trunks.";Four 4.5" x 2.75" B/W photos numbered 218, 219, 220, 221
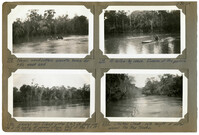
Image #222 (2.75" x 4.5"): "3-30-29. An obstruction in the Chicken Creek channel. Note the water back in the woods."; Image #223 (2.75" x 4.5"): "3-30-29. The motor boat which was used to tow small rafts to the Santee Bridge."; Image #224 (2.75" x 4.5"): "3-30-29. 7 to 8 Ft. of water over the 'mainland' where piles were being cut."; Image #225 (2.75" x 4.5"): "3-30-29. A 90 ft. cypress tree, felled from a boat. Must be cleared and floated out.";Four 4.5" x 2.75" B/W photos numbered 222, 223, 224, 225
Image #226 (2.75" x 4.5"): "3-30-29. Piles floated out and rafted, ready to be towed to the Santee Bridge."; Image #227 (2.75" x 4.5"): "3-30-29. Woodcutters camp on a knoll along the bank of Chicken Creek - Santee River Swamps."; Image #228 (2.75" x 4.5"): "3-30-29. H.W. & R.H. Morrison of McClellanville, S.C. Piling contractors for McCl. Mar. Co. on the Cooper River Bridge.";Three 4.5" x 2.75" B/W photos numbered 226, 227, 228
Image #230 (2.75" x 4.5"): "4-7-29. Top deck of double-deck Span Traveler, looking toward front boom and A-frame."; Image #231 (2.75" x 4.5"): "4-7-29. Detail at heel of main (front) boom. Double-deck span traveler."; Image #234 (2.75" x 4.5"): "4-7-29. Deckspan 12 swung and steel falsework bents removed."; Image #233 (2.75" x 4.5"): "4-7-29. Detail at heel of rear boom. Double-deck traveler.";Four 4.5" x 2.75" B/W photos numbered 230, 231, 233, 234
Image #236 (2.75" x 4.5"): "4-7-29. Rear view of Viaduct Traveler 'C' erecting Span Traveler 'A' on Span 5."; Image #237 (2.75" x 4.5"): "4-7-29. Side view of #236."; Image #232 (4.5" x 2.75"): "4-7-29. Top deck of double-deck Span Traveler A, looking toward rear boom, A-frame and backstay connection.";Three 4.5" x 2.75" B/W photos numbered 232, 236, 237
Image #235 (4.5" x 2.75"): "4-7-29. Material Tower with two 50 ton stiffleg derricks on top, erected to a height of 3 panels (ab't 95 ft.) On dock at Pier 13."; Image #238 (4.5" x 2.75"): "4-9-29. Main boom of Span Traveler 'B' being raised by gin pole after A-frame has been tripped into position."; Image #239 (4.5" x 2.75"): "4-9-29. From deck of Viaduct Traveler 'C', erecting Span Traveler 'B'.";Three 4.5" x 2.75" B/W photos numbered 235, 238, 239
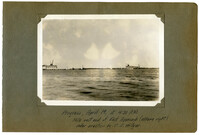
Unnumbered Image (5" x 7"): "Progress, April 19, 1929 at 4:30 P.M. Note east end of East Approach (extreme right) under erection by C.E. Hillyer.";One 5" x 7" B/W photo
Image #240 (2.75" x 4.5"): "4-9-29. Compressor plant under Span 35D, near Pier 5, and ramp leading to it from Pier 37D which is in deep water."; Image #242 (2.75" x 4.5"): "4-18-29. Falsework under Span 5. Falsework bents have battered columns."; Image #241 (2.75" x 4.5"): "4-18-29. Rocker bearing and roller expansion shoe under 270 ft. deck truss span - Pier 6."; Image #243 (2.75" x 4.5"): "4-15-29. Span 5 erected to U5L6.";Four 4.5" x 2.75" B/W photos numbered 240, 241, 242, 243
Image #244 (2.75" x 4.5"): "4-18-29. Span 5 completed. Viaduct Traveler at left being removed by stiffleg derrick, which it has set up in front of it."; Image #245 (2.75" x 4.5"): "4-18-29. Spans 11 and 12 completed."; Image #246 (4.5" x 2.75"): "4-23-29. Erecting Span 10. Taken from near Pier 12, looking west toward Pier 11, anchor pier 10 and main piers 9 and 8.";Three 4.5" x 2.75" B/W photos numbered 244, 245, 246
Image #248 (4.5" x 2.75"): "4-23-29. Span 5 completed and working on Span 6."; Image #249 (4.5" x 2.75"): "4-23-29. From top of anchor pier 7, looking west toward Span Traveler B erecting Span 6." Image #250 (4.5" x 2.75"): 4-23-29. From top of viaduct at bent #12E, looking west. Town Creek Span in distance.";Three 4.5" x 2.75" B/W photos numbered 248, 249, 250
Image #247 (2.75" x 4.5"): "4-24-29. Spans 10, 11, and 12. Span 10 under erection."; Image #252 (2.75" x 4.5"): "4-24-29. From Span 1E, looking east. Hydraulic fill causeway in distance."; Image #251 (2.75" x 4.5"): "4-24-29. re-erecting viaduct traveler on Span 1E, at Pier 13, to complete East Approach."; Image #253 (2.75" x 4.5"): "4-24-29. East abutment - looking west. Spans 21E to 13E have been erected by C.E. Hillyer.";Four 4.5" x 2.75" B/W photos numbered 247, 251, 252, 253
Image #254 (2.75" x 4.5"): "4-24-29. East Approach - end of causeway and start of steel girder spans."; Image #256 (2.75" x 4.5"): "4-24-29. Typical timber pile falsework footing before being braced. Piles are unusually well lined up."; Image #255 (2.75" x 4.5"): "4-23-29. Falsework footings 28 and 29 & Pier 8 beyond - looking east from top of anchor pier 7."; Image #257 (2.75" x 4.5"): "4-23-29. Framing timber falsework pile bents.";Four 4.5" x 2.75" B/W photos numbered 254, 255, 256, 257