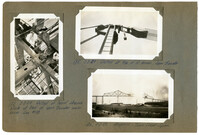
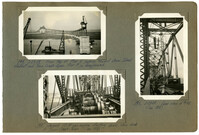
Image #133 (4.5" x 2.75"): "3-3-29 Detail of lead sheave block at heel of span traveler main boom. See #108."; Image #135 (2.75" x 4.5"): "3-3-29. Detail at top of A-frame. Span traveler."; Image #136 (2.75" x 4.5"): "3-3-29. Progress - Town Creek Span.";Three 4.5" x 2.75" B/W photos numbered 133, 135, 136
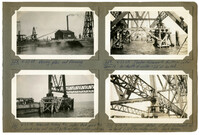
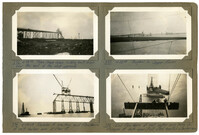
Image #258 (2.75" x 4.5"): "4-23-29. Driving piles and framing."; Image #260 (2.75" x 4.5"): "4-23-29. Falsework footing #16, under deck span #10. Two (2) plumb piles and six (6) battered piles under each col."; Image #259 (2.75" x 4.5"): "4-23-29. Timber falsework footings under Span 10. Av. depth of water = 25' at low tide."; Image #261 (2.75" x 4.5"): "4-24-29. typical detail of steel falsework col. on ton of 2-200 ton wedge jacks. Deck spans.";Four 4.5" x 2.75" B/W photos numbered 258, 259, 260, 261
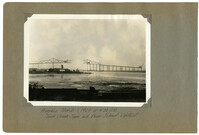
Image #244 (2.75" x 4.5"): "4-18-29. Span 5 completed. Viaduct Traveler at left being removed by stiffleg derrick, which it has set up in front of it."; Image #245 (2.75" x 4.5"): "4-18-29. Spans 11 and 12 completed."; Image #246 (4.5" x 2.75"): "4-23-29. Erecting Span 10. Taken from near Pier 12, looking west toward Pier 11, anchor pier 10 and main piers 9 and 8.";Three 4.5" x 2.75" B/W photos numbered 244, 245, 246
Image #284 (4.5" x 2.75"): "4-30-29. Same as 283."; Image #287 (2.75" x 4.5"): "5-1-29. Anchor bent completed on Pier 7."; Image #288 (2.75" x 4.5"): "5-2-29. Progress in Cooper River. Both travelers are standing over the anchor piers - ready to start erection of main span.";Three 4.5" x 2.75" B/W photos numbered 284, 287, 288
Image #248 (4.5" x 2.75"): "4-23-29. Span 5 completed and working on Span 6."; Image #249 (4.5" x 2.75"): "4-23-29. From top of anchor pier 7, looking west toward Span Traveler B erecting Span 6." Image #250 (4.5" x 2.75"): 4-23-29. From top of viaduct at bent #12E, looking west. Town Creek Span in distance.";Three 4.5" x 2.75" B/W photos numbered 248, 249, 250
Image #76 (2.75" x 4.5"): Temporary top chord links between U13 and U14, carrying diaphragms for hydraulic jacks - Town Creek Span."; Image #77 (2.75" x 4.5"): "End view of links shown in #76."; Image #78 (2.75" x 4.5): "End view of top chords U12 U13 at U13. (see #87).";Three 4.5" x 2.75" B/W photos numbered 76, 77, 78
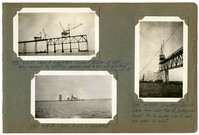
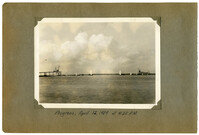
Image #272 (2.75" x 4.5"): "4-28-29. Town Creek Span, looking east from near the end of west approach."; Image #273 (2.75" x 4.5"): "4-28-29. Progress in Cooper River."; Image #274 (2.75" x 4.5"): "4-29-29. Traveler A erecting end floorbeam of west anchor arm at Pier 10."; Image #275 (2.75" x 4.5"): "End floorbeam of west anchor arm hung on stringers of deck span. First steel erected on anchor arm.";Four 4.5" x 2.75" B/W photos numbered 272, 273, 274, 275
Image #194 (2.75" x 4.5"): "3-27-29. From top of Pier 6, looking toward Drum Island viaduct and Town Creek Span. Pier 5 in foreground."; Image #195 (2.75" x 4.5"): "Second 150 HO gas. Engine starting down thru deck of Town Creek Span. (See 188)"; Image #196 (4.5" x 2.75"): "3-28-29. rear view of #195. (See 188)";Three 4.5" x 2.75" B/W photos numbered 194, 195, 196
Limit your search
Photographic Record of the Cooper River Bridge✖[remove]202