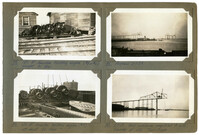
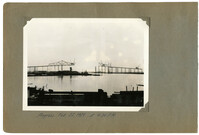
Image #79 (2.75" x 4.5"): "150 HP Gasoline hoisting engine (#5 or #6). Weight 31 tons."; Image #80 (2.75" x 4.5"): "100 HP Gasoline hoisting engine (#7). Weight about 26 tons."; Image #81 (2.75" x 4.5"): "Progress 2-1-29."; Image #82 (2.75" x 4.5"): "2-7-29. West cantilever completed to L12. Traveler at L10. Town Creek.";Four 4.5" x 2.75" B/W photos numbered 79, 80, 81, 82
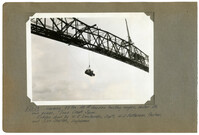
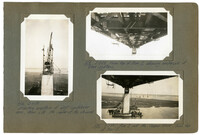
Unnumbered Image (5" x 7"): "Lowering 33 ton, 150 HP Gasoline hoisting engine, under its own power. Town Creek Span. Ridden down by W.E. Omohundro, Sup't., W.S. Patterson, Pusher, and John Shelton, Engineman.";One 5" x 7" B/W photo
Image #159 (2.75" x 4.5"): "3-13-29. The closing bottom chord joint at L17! Member on left has slotted hole at pin."; Image #160 (2.75" x 4.5"): " Closing joint at L17! 4" slotted hole allows erection of closing chord at any temperature."; Image #161 (2.75" x 4.5"): "3-13-29 Progress."; Image #162 (2.75" x 4.5"): "3-3-29. Closing bottom chords in place.";Four 4.5" x 2.75" B/W photos numbered 159, 160, 161, 162
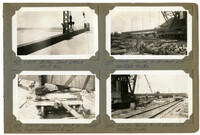
Image #264 (2.75" x 4.5"): "4-24-29. Driving piles for falsework footings. Anchor Pier 10."; Image #266 (2.75" x 4.5"): "Progress in Cooper River. Looking north."; Image #265 (2.75" x 4.5"): "4-24-29. Typical group of piles pulled together for bracing & cutting off."; Image #267 (2.75" x 4.5"): "4-26-29. Loading cypress piles from car to lighter.";Four 4.5" x 2.75" B/W photos numbered 264, 265, 266, 267
Image #437 (2.75" x 4.5"): "6-13-29. Bottom chord L14 L16. Wt. 17 tons."; Image #438 (2.75" x 4.5"): "6-14-29. Turntable truck for turning long truss members end for end."; Image #439 (2.75" x 4.5"): "6-14-29. Turning 90 ft. chord with turntable trucks."; Image #440 (2.75" x 4.5"): "6-14-29. Turning 90 ft. chord with turntable trucks.";Four 4.5" x 2.75" B/W photos numbered 437, 438, 439, 440
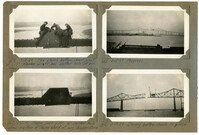
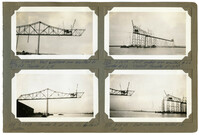
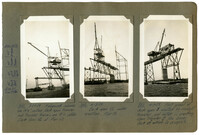
Image #122 (2.75" x 4.5"):"2-24-29. West cantilever arm erected to L17 L18 - Traveler at L15."; Image #124 (2.75" x 4.5"): "2-25-29. Traveler A at L16, its farthest position."; Image #123 (2.75" x 4.5"): "2-24-29. East anchor arm erected to L6. Traveler at L6. Viaduct traveler at right."; Image #125 (2.75" x 4.5"): "2-25-29. East anchor arm at Pier 3.";Four 4.5" x 2.75" B/W photos numbered 122, 123, 124, 125
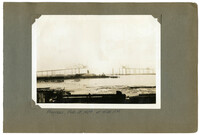
Image #126 (4.5" x 2.75"):"3-1-29. Starting erection of east cantilever arm, from L18, the center of the channel."; Image #129 (2.75" x 4.5"): "3-3-29. From top of Pier 2 showing underside of floor system."; Image #130 (2.75" x 4.5"): "3-3-29. Pier 3 and the Cooper River, from top of Pier 2.";Three 4.5" x 2.75" B/W photos numbered 126, 129, 130