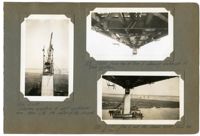
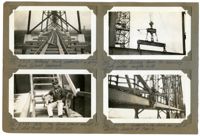
Image #126 (4.5" x 2.75"):"3-1-29. Starting erection of east cantilever arm, from L18, the center of the channel."; Image #129 (2.75" x 4.5"): "3-3-29. From top of Pier 2 showing underside of floor system."; Image #130 (2.75" x 4.5"): "3-3-29. Pier 3 and the Cooper River, from top of Pier 2.";Three 4.5" x 2.75" B/W photos numbered 126, 129, 130
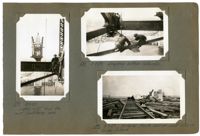
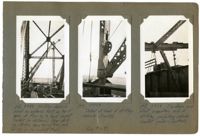
Image #133 (4.5" x 2.75"): "3-3-29 Detail of lead sheave block at heel of span traveler main boom. See #108."; Image #135 (2.75" x 4.5"): "3-3-29. Detail at top of A-frame. Span traveler."; Image #136 (2.75" x 4.5"): "3-3-29. Progress - Town Creek Span.";Three 4.5" x 2.75" B/W photos numbered 133, 135, 136
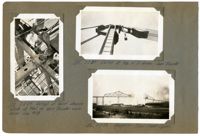
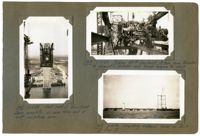
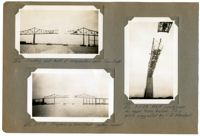
Image #137 (4.5" x 2.75"): "3-7-29. Looking west from the east cantilever arm."; Image #138 (2.75" x 4.5"): "3-7-29. Erecting bottom laterals."; Image #139 (2.75" x 4.5"): "3-7-29. Material track laid on mud sills on Drum Island.";Three 4.5" x 2.75" B/W photos numbered 137, 138, 139
Image #140 (2.75" x 4.5"): "3-7-29. Material truck supported on piling. Drum Island Approach."; Image #141 (2.75" x 4.5"): "3-7-29. 'Billy' the Drum Island mascot, at top of stair tower with Buckholt."; Image #142 (2.75" x 4.5"): "3-7-29. Balance beam for handling plate girders. Length 10ft."; Image #146 (2.75" x 4.5"): "3-11-29. Support & tie-down for sill of stiffleg derrick at Pier 4.";Four 4.5" x 2.75" B/W photos numbered 140, 141, 142, 146
Image #143 (4.5" x 2.75"): "3-7-29. Stiffleg derrick used as material hoist on top of span at Pier 4, to feed viaduct traveler (in distance). Near stiffleg sticks thru truss (#146) and far leg is on viaduct (#145)."; Image #144 (4.5" x 2.75"): #3-7-29. Detail at heel of stiffleg derrick SO4383 (See #167)."; Image #145 (4.5" x 2.75"): "3-7-29. Tie-down and strut supporting end of stiffleg projecting outside viaduct girder (See #143).";Three 4.5" x 2.75" B/W photos numbered 143, 144, 145
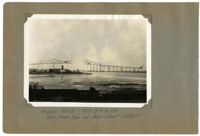
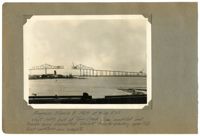
Unnumbered Image (5" x 7"): Progress March 8, 1929 at 4:30 P.M. West (left) half of Town Creek Span completed and traveler being dismantled. Viaduct traveler erecting span 17D. East cantilever arm complete.";One 5" x 7" B/W photo
Image #147 (4.5" x 2.75"): "3-11-29. West half of Town Creek Span complete, as seen from end of east cantilever arm."; Image #148 (2.75" x 4.5"): "3-11-29. Picking 150 HP Gas. Hoist, 31 tons, from traveler to dismantle traveler and lower engine to deck."; Image #149 (2.75" x 4.5"): "3-11-29. Erecting material tower on dock at Pier 13.";Three 4.5" x 2.75" B/W photos numbered 147, 148, 149
Image #150 (2.75" x 4.5"): "Erecting east half of suspended span - Town Creek."; Image #152 (2.75" x 4.5"): "3-13-29. Progress in Town Creek - getting nearer!"; Image #151 (2.75" x 4.5"): "3-11-29. West cantilever as seen from below. This photo suggested by C.D. Marshall.";Three 4.5" x 2.75" B/W photos numbered 150, 151, 152
Image #153 (2.75" x 4.5"): "3-13-29. One more panel to be erected."; Image #154 (2.75" x 4.5"): "3-13-29. Ready to erect the first closing bottom chord."; Image #155 (2.75" x 4.5"): "3-13-29. Erecting the closing bottom chord - south truss - Town Creek Span."; Image #158 (2.75" x 4.5"): "3-13-29. Erecting the closing bottom chord - north truss - Town Creek Span.";Three 4.5" x 2.75" B/W photos numbered 153, 154, 155, 158