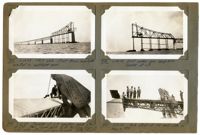
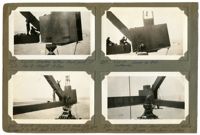
Image #377 (2.75" x 4.5"): "5-29-29. West side. First truss members erected in cantilever arm."; Image #378 (2.75" x 4.5"): "5-29-29. East anchor arm complete. Traveler at L9."; Image #379 (2.75" x 4.5"): "5-31-29. Traveler at L9 erecting peak strut at U10. Then moves back 15 ft. to allow boom to "duck" under strut and move forward.. Not drift."; Image #380 (2.75" x 4.5"): "5-31-29. Peak strut at U10 east side, as shown in 379.";Four 4.5" x 2.75" B/W photos numbered 377, 378, 379, 380
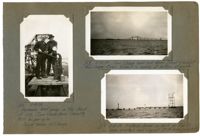
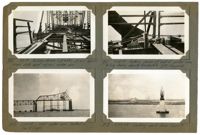
Image #166 (4.5" x 2.75"): "3-15-29. Hydraulic hand pump on top chord at U13, Town Creek Span. Capacity 8000 lbs. Per sq. in. 'Swede' Nelson and V.I. Varga."; Image #168 (2.75" x 4.5"): "3-15-29. Town Creek Span and Drum Island Viaduct from Cooper River. Viaduct is nearly at bottom of grade."; Image #169 (2.75" x 4.5"): "3-15-29. Material tower on dock at Pier 13. One boom erected and rigged. (50 ft. boom, on right).";Three 4.5" x 2.75" B/W photos numbered 166, 168, 169
Image #178 (4.5" x 2.75"): "3-17-29. Town Creek Span, from below, near Pier 3 - looking west."; Image #179 (2.75" x 4.5"): "3-17-29. Falsework bent for deck span #12, taken from the East Approach Viaduct permanent steel for temporary use."; Image #180 (2.75" x 4.5"): "3-20-29. First panel of deck span #12 erected by material tower at Pier 13. Pier 12 at left.";Three 4.5" x 2.75" B/W photos numbered 178, 179, 180
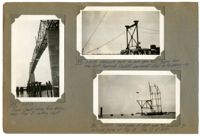
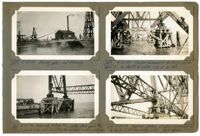
Image #339 (2.75" x 4.5"): "5-21-29. West anchor arm ready to erect last panel 8-10, and land on main pier 8."; Image #340 (2.75" x 4.5"): "5-22-29. East anchor arm erecting last panel 8-10, to land on main pier 9."; Image #341 (2.75" x 4.5"): "5-22-29. Setting shoe in Pier 8. wt. of lower shoe = 10 tons. Base 7'-3 x 8'-6 = 61.6 [square feet]"; Image #342 (2.75" x 4.5"): "5-22-29. Setting main shoes on Pier 8.";Four 4.5" x 2.75" B/W photos numbered 339, 340, 341, 342
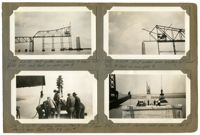
Image #343 (2.75" x 4.5"): "5-22-29. Erecting bottom chord joint at L10, Pier 8. Weight 13 tons."; Image #344 (2.75" x 4.5"): "5-22-29. Same as 343. (Leatherman)."; Image #345 (2.75" x 4.5"): "5-22-29. Pulling joint L10 back into place to connect to bott. chord L8 L10 and diagonal M9 L10."; Image #348 (2.75" x 4.5"): "5-23-29. Bottom chord joint L10 before erection of stringers. Floorbeam in place.";Four 4.5" x 2.75" B/W photos numbered 343, 344, 345, 348
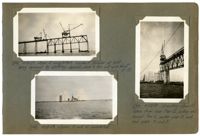
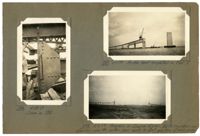
Image #350 (2.75" x 4.5"): "5-23-29. Pulling device (at left) at L0 - Span 9. Where deck span adjoins anchor arm."; Image #351 (2.75" x 4.5"): "5-23-29. Jacking device at end of anchor arm. Pulling device, showing turnbuckle - just beyond."; Image #352 (2.75" x 4.5"): "5-23-29. West anchor arm landed on Pier 8 (right)."; Image #353 (2.75" x 4.5"): "5-24-29. Looking west from Span 9.";Four 4.5" x 2.75" B/W photos numbered 350, 351, 352, 353
Image #258 (2.75" x 4.5"): "4-23-29. Driving piles and framing."; Image #260 (2.75" x 4.5"): "4-23-29. Falsework footing #16, under deck span #10. Two (2) plumb piles and six (6) battered piles under each col."; Image #259 (2.75" x 4.5"): "4-23-29. Timber falsework footings under Span 10. Av. depth of water = 25' at low tide."; Image #261 (2.75" x 4.5"): "4-24-29. typical detail of steel falsework col. on ton of 2-200 ton wedge jacks. Deck spans.";Four 4.5" x 2.75" B/W photos numbered 258, 259, 260, 261
Image #244 (2.75" x 4.5"): "4-18-29. Span 5 completed. Viaduct Traveler at left being removed by stiffleg derrick, which it has set up in front of it."; Image #245 (2.75" x 4.5"): "4-18-29. Spans 11 and 12 completed."; Image #246 (4.5" x 2.75"): "4-23-29. Erecting Span 10. Taken from near Pier 12, looking west toward Pier 11, anchor pier 10 and main piers 9 and 8.";Three 4.5" x 2.75" B/W photos numbered 244, 245, 246
Image #284 (4.5" x 2.75"): "4-30-29. Same as 283."; Image #287 (2.75" x 4.5"): "5-1-29. Anchor bent completed on Pier 7."; Image #288 (2.75" x 4.5"): "5-2-29. Progress in Cooper River. Both travelers are standing over the anchor piers - ready to start erection of main span.";Three 4.5" x 2.75" B/W photos numbered 284, 287, 288
Image #248 (4.5" x 2.75"): "4-23-29. Span 5 completed and working on Span 6."; Image #249 (4.5" x 2.75"): "4-23-29. From top of anchor pier 7, looking west toward Span Traveler B erecting Span 6." Image #250 (4.5" x 2.75"): 4-23-29. From top of viaduct at bent #12E, looking west. Town Creek Span in distance.";Three 4.5" x 2.75" B/W photos numbered 248, 249, 250
Limit your search
Photographic Record of the Cooper River Bridge✖[remove]202